New stitches: Griddle Stitch

Also known as the Cobble Stitch, and probably a couple of other names. You know what crochet is like.

I came across this stitch through this Furls CAL for a skirt and crop top. I’m still undecided about the top, but as soon as I saw it I knew I was going to make the skirt.

Megara skirt

Isn’t it pretty?

So the griddle stitch is suuuuuper easy; all you need is chains, single crochet, and double crochet. The skirt starts with a foundation row of sc, but I don’t know if that’s an absolute requirement every time.

Then you sc, dc, sc, dc all the way across. On the return you make a sc into each dc, and a dc into each sc. Simples!

This does mean that the number of chains you make on the turn depends on the stitch you finished the previous row with. In the skirt pattern, every row finishes with a sc so I chain 3 when turning, which counts as the first dc. If it finished on a dc I would chain 1 to count as the first sc.

Hopefully that makes some kind of sense. I’m on some pretty strong painkillers right now so I take no responsibility if every word of this post is complete mince 😉

And this is what my griddle/cobble stitch skirt looks like so far.

Yes it is really small. I’m a fat babe; this is going to take a while! But it’s in my favourite colour and I’m excited about being able to wear the finished skirt eventually so I’m not bored yet.

What do you think of griddle stitch? Do you know it by any other names? Let me know in the comments!

Hannah

xXx

New stitches: Broomstick lace crochet

Ages and ages ago I saw a post on Yolanda’s blog that mentioned broomstick lace crochet and I desperately wanted to try it straight away. But when I got home that day, I checked my broom and found it had a non-removable cap on the end, which made it useless (for crochet anyway). Nor could I find anything else in my flat thick enough to work, so I put it on hold and then kind of forgot about it.

UNTIL I was wandering round Asda during a rainy lunch break and spotted Crochet Now sitting on the shelf, with a free broomstick crochet set. That’s the quickest I’ve ever put anything in my basket. It contained three ‘broomsticks’ and a crochet hook to use with them.

Broomstick lace crochet set

Looking at them now I realise I probably could have used one of the many plastic rulers I have lying about the flat, but I was so fixated on finding something round that the thought never occurred. At least now I have a back up plan if I lose these!

I got stuck in that evening and, as usual with new things, it involved a bit of trial and error. My first error was forgetting that I use US crochet terms and I was reading a UK magazine. It took a wee while to figure out why mine didn’t look like the photos. Plus I found parts of the step-by-step instructions lacking and had to figure out a couple of things for myself.

My first proper practice attempt wasn’t completely terrible

IMG-20180815-WA0000.jpg

So I jumped in and started making the first pattern in the booklet: an easy cowl. The pattern calls for Cygnet yarn in bright pink, which just so happens to be part of the swap yarn I got from Rebecca! I still wanted it combined with the grey yarn she also sent me, so I held the two together and went for the largest broomstick.

It’s turning out exactly as I imagined, and I love it.

Screenshot_2018-08-15-09-00-26-1.png

Has anyone else tried broomstick lace? Tempted to give it a go now? Let me know in the comments!

Hannah

xXx

New stitches: knitted cables


I have noticed an issue with a lot of cable tutorial videos. They’ll tell you how to read charts or instructions for those 4, 6, 8 etc stitches. They show you how to cable left or right, placing the 2, 3, 4 stitches to the front or back. They can even show you how to do fancy stag head or owl cables, as many stitches as the cables need. And that’s it.

My first attempt looked a right mess because I did the cabling on every single row, when not one of those videos explained knitting straight rows in between.  My ‘cables’ also looked camouflaged, because none of them mentioned that cables stand out better against purl stitches. These seem like vital parts of cabling to me, so I don’t understand why they’re not included in cable tutorials!

Luckily, I found this video here, which explains it fully (if a bit waffle-y) and I saw where I’d been going wrong.  I also used this one to see how I could do it without a cable needle. Which is of course the method I use, as I’m too stingy to pay for a cable needle, and too lazy to dig out a thinner knitting needle when it can work perfectly well without.

At first I tried using some red yarn that was just sitting beside me on the sofa, forgetting that red is a terribly difficult colour to photograph!

So I just had to try again with a better colour

After figuring out the issues, I can’t believe how simple cabling is! I’ve always thought of them as a super advanced skill that I can only dream of one day mastering, and now I’m messing around making up my own (very simple) pattern with them.

So if anyone else is a bit scared of cables my advice is to just give it a go using a good tutorial. There’s nothing to lose, and an awesome new skill to gain!

Hannah

xXx


New stitches: Tunisian crochet in the round

I finally learned why Tunisian hooks are double ended! You can get that wonderful texture Tunisian crochet is known for, in the round.

Here’s my mini tutorial, with photos because I really struggled with the tutorial in a magazine which was written instructions only.

Start off chaining as many as you need and join with a slip stitch, as usual when crocheting in the round.

20180328_110140.jpg

Pull up a few loops, but make sure not to load too many onto the hook

20180328_110332.jpg

When you’ve pulled up some loops, slide the piece down to the opposite end of the hook

20180328_110634.jpg

Then flip it horizontally so you’re ready to work with the hook by the stitches

20180328_110707.jpg

This is for my jumper so I’m using a different coloured yarn on the return, but obviously you can use the same colour if you like.

Attach a new skein/ball at this end and start a return pass, making sure to only pull the working yarn through one loop for the first stitch and then two for all subsequent stitches

20180328_110854-1.jpg

When you finish the return pass and have one loop left on the hook, slide it to the far end again.

20180402_074609-1.jpg

Turn the hook, pick up the first working yarn (pink in this case) and start the process again.

20180328_110942.jpg

And then repeat until the piece is long enough!

If you need to keep track of rounds like I do for my jumper, you’ll need to place a marker in the first stitch and move it up as you go

It took me a while to get the tenson consistent all the way around, but like most things it just takes practice. I found it helps to hold the non-active yarn in my right hand rather than just leaving it hanging.

So there you have it. Has anyone else tried Tunisian in the round? Got any more tips to share? Let me know in the comments!

Hannah

xXx

New stitches: Tunisian Purl Stitch

I learned quite a few Tunisian stitches last weekend, but I’m going to share this one first because it solves the curling problem!

I give you the Tunisian Purl Stitch! *cue Hallelujah Chorus*

It’s basically the same as doing the simple stitch, but you start off with the yarn in front of the hook rather than behind it.

The only awkward part I’ve found is that my first attempts were super tight so when I came to use them on the next round I couldn’t get the hook through. One solution (shown in this here video) is to hold on to the yarn with your thumb while you yarn over, which keeps it from pulling up tight.

(Side note: I never knew people said TOO-NEE-SHUN. I always say TYOO-NIZ-EE-UN.)

The magic is that just one row of this purl stitch at the start of my work stopped the curling entirely!

20180210_165738-1.jpg

See, this is the start of my sleeve. You can see the bumps on the front, that’s the purl row, and the rest of the cuff is simple stitch, and it’s not curling at all.

20180210_165708-1.jpg

I’m assuming (but haven’t actually tested) that a piece made entirely of purl stitch would curl the other way, and it’s the balance between the two directions that keeps it straight. But making something entirely out of purl stitch seems silly to me when simple stitch is less fiddly, so I’m going to purl one or two rows at the start of my Tunisian pieces and then carry on as normal with other stitches.

I’m so excited about fixing the curling problem! Is that weird? Is anyone else as happy about it? Please let me know in the comments!

Hannah

xXx

New stitches: Tunisian knit stitch, and…?

Tunisian is so much fun, I decided to learn another stitch this week. Quite a few people mentioned the knit stitch after my last post, and I love the regularity of knit stitches, so I decided to give it a go.

Turns out it’s not as easy as the simple stitch (shocking, right?), and at first I made a whole swatch using…I don’t actually know if it’s a real thing.

For the knit stitch you’re supposed to pass the hook through the loop of the previous round, right here:

20180128_201514-1.jpg

I totally misunderstood the tutorial (it wasn’t great) and went through the space at the side of the loop, like so:

20180128_201657-1-1.jpg

Which meant that I had to increase one stitch every single row or skip one at the start, which gave me a very wonky-edged swatch. It did look pretty though.

20180127_163625.jpg

But considering I’ve never seen knitting like that in my life I figured I must have got it wrong. I frogged it, found a better tutorial, and had another go.

20180128_201731-1.jpg

Much better! That’s the column layout I’ve come to know and love, so I’m now officially adding the Tunisian knit stitch to my repertoire.

Does anyone know if my first attempt was a different stitch or did I just make a mess? What do you think of the actual knit stitch? Let me know in the comments!

Hannah

xXx

New stitches: Tunisian crochet simple stitch

Months ago I got a magazine with a free Tunisian crochet hook. I tried it with some cheap, nasty, splitty yarn so of course I struggled, and I put it down for ages.

Then this weekend just gone, a suggested video popped up to learn the Tunisian simple stitch. As you may have guessed, I clicked on it!

This stitch is so easy, I picked it up straight away (so it definitely was the yarn’s fault last time) and whacked out this swatch.

My first ever swatch. So proud. I really love the texture of it, but also I suuuuuper hope that blocking sorts out the curl. This thing is convinced it’s meant to be a sausage roll.

I’m assuming there are other, more complicated stitches that require a double-ended hook, but this just uses one end like regular crochet. I’ll be looking up more stitches soon enough!

I’ve fallen completely in love with this, so keep an eye out for some Tunisian WIPs in the future.

Has anyone else tried Tunisian? Did you love it or hate it? Let me know in the comments!

Hannah

xXx

18 for 2018

Last year I followed a few bloggers who were doing the 17 for 2017 goal-setting challenge.  I loved the idea, but by the time I came across it the year was already well under way and I felt it was too late to join in and try catching up.

I wasn’t entirely sure I would try it this year either, but then (most unlike me) I started thinking about it in the run up to Christmas, and making a plan.

To start off I just wrote a list of everything I want to work on this year – things like making my Etsy shop more successful, getting my fitness back, and tidying up/decluttering my flat.

Then I had a play around putting them into order by priority level, and the amount of time it would take to achieve them. And finally I assigned them all to their number.

I’ll be honest; I’m not 100% convinced I’ll keep all of these goals in these formats, but it’s a starting point and gives me something to work towards. So here are my 18 for 2018 goals:

1 New blog followed per week

I love my blogging family and I’d love to grow it even more.

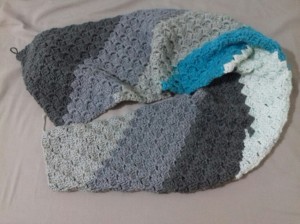
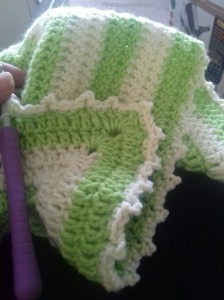
2 New stitches/techniques learned per month

I tend to stick with my favourite stitches in crochet, and I’d love to advance my knitting.

3 Instagram posts per week

This was supposed to be another avenue for advertising my shop, but I kinda failed last year. I’m hoping to fix that this year.

4 Exercise sessions per week

Oh I want to be fit and strong again!

5 Blog posts written per week

For more regular posting, but also to create a backlog that I can use as scheduled posts during busy weeks.

6 Patterns written up

I think this will be the year I really get into writing patterns. I’ve already made a start on one and I enjoyed the process.

7 Rooms in my flat sorted

There are still some boxes I have never unpacked since I moved into this flat 9 months ago, plus I’m just a messy person. It needs sorting.

8 Minutes of writing per day

This could be blogs, short stories, or the novel I’ve been working on for years. Doesn’t matter, just as long as I get my creative writing muscles flexing.

9 pm bed time

I need a lot of sleep. A lot. But I would also like to start getting up early enough to exercise before work like I used to, so the only answer is to get to bed on time.

10% of wages saved

My friend in New Zealand is getting married this year, and going to that will wipe out pretty much all of my savings. This goal will hopefully build them back up again pretty quickly.

11 Items listed in my shop

I was utterly rubbish with this last year. Time to sort myself out.

12 Hand-written letters sent

My friends and I used to write letters to each other regularly, but at some point we got out of the habit. I’m determined to get back into it again.

13 New recipes tried

I get bored easily.

14 Meet ups with friends

I had a looooooot of problems last year, and one of my coping mechanisms (which turned out to be hindrance rather than help) was to withdraw from pretty much everyone. I’m an introvert so I do need my alone time, but I refuse to let it slide into loneliness again.

15 Birthdays on time

Confession: I still haven’t sent a present to my friend whose birthday was in September. I’m great at buying/making the presents, now I just need to get myself to the post office and send them on time!

16 Christmas cards made

The hope being that I won’t need a frantic making sessions in the second week of December.

17 Birthday cards made

Partly ties in with 15, but I’m also hoping to build up some stock for the shop.

18 Items decluttered

I have too much stuff. Nuff said.


I’m a bit of a nerd, so I printed off a chart for tracking them all weekly and it’s going to be pinned to my bedroom mirror so I can keep an eye on it as the year goes on. They’re even colour-coded by weekly/monthly/yearly goals.

Wish me luck!

Hannah

xXx

New stitches: popcorn stitch

The popcorn stitch seemed a bit scary to me. I’d read the how-to description in a few patterns, but I just couldn’t visualise what I was supposed to do.

Luckily I dived into the Lost In Time shawl without reading the whole pattern first, so I was already fully committed by the time I got to the line ‘1 popcorn stitch in each dc’. Also luckily, this pattern came with photos alongside the how-to, so I was able to make my first popcorn at last.

As with most things, I’m really not sure why I was worried  – it’s so simple and looks really good!

You just place 4 stitches into one stitch 

Remove your hook

Go through the top of the first stitch in the cluster of 4

then pick up the loop you dropped

And pull it through

Simples!

Here’s my first ever row of popcorns.

I’m assuming they will pop more as I go on and get more comfortable with the stitch, but this shawl is for myself so I’m not frogging back just to make it ‘perfect’. It might actually be fun to keep it as a record of my progress!

Have you used the popcorn stitch before? Any tips for making it more pop-y? Let me know in the comments!

Hannah

xXx

New stitches: puff stitch 

And also WIP Wednesday. I love a twofer!

I’m making a Puff Scarf, which uses a TON of puff stitches, as the name suggests.  These are the squishiest stitches I have ever squished! I loves them!

Here’s how to make your own squishy goodness (am I saying squish too much??)

Yarn over, go into the space, and pull up a loop to the height of a stitch (dc in this case)

20170621_210827

yarn over again

20170621_210850

go into the same stitch and pull up another loop

20170621_210909

Do it again

20170621_210922

And again

20170621_210940

Now there are 9 loops on the hook. One final yarn over, and pull through all 9 loops

20170621_211002

Then it’s just a chain to secure it, and you’re done!

20170621_211024

Do it enough times and you’ll end up with a super squishy (I just can’t stop saying it!), beautiful scarf. I’m using a Mixed Berry Caron Cake and so far it looks like this

20170621_134900

I’m probably very late to the puff stitch party, what have other people made with it? What do you think of my scarf? Let me know in the comments!

Hannah

xXx

New stitches: hairpin lace crochet 

I have Tami to thank for this particular stitch-learning. I saw her post about it, and the beautiful things that can be made with it, and I pretty much knew I’d be getting a loom one day.

So when I saw Crochet Now sitting on a shelf in Morrisons with a free hairpin loom, I was completely unable to resist! It just jumped into my trolley and I had to buy it. 

I tried to be good and read through the instructions first, but that’s really not the way my mind works. I got terribly confused trying to imagine exactly what I was supposed to do with it, and it made very little sense, so I just set up and jumped right in.

Screenshot_2017-06-14-09-46-31-1

It was both easier and more difficult than I expected: easier because it’s just chains and single crochet, which I already knew, with some wrapping round the frame added in. More difficult because I’m positive you need at least 3 hands to work it properly.

20170609_190806-1
How do you stop this happening every 5 seconds??


For my first attempt I produced this lovely lace:

20170609_183448

I’m not sure if you can see from the photo just how varied the loop sizes are, but you can definitely see that it’s not a straight line. My hope is that this is just a beginner thing – even after 3 years of crocheting my tension still goes very tight when I’m thinking too much about what I’m doing. Now I’ve got the general idea I think my next piece should come out much more even.

So that’s hairpin crochet! Aside from having to reattach the frame every time I move, it’s really fun and I’m looking forward to making something beautiful with it.

What do you think of hairpin crochet? Fancy giving it a go? Let me know in the comments!

Hannah

xXx

April review 

Monthly reviews are a really good idea. I didn’t think I’d achieved much in April, what with moving house, having my birthday, and being quite ill for a few days, but looking back at it there’s actually quite a list of makes!

This weekend I started a chevron blanket that will be a surprise flat-warming gift for a friend. I’ve seen the flat (it’s fabulous!) and the colours I’ve chosen will fit right in.

IMG_20170430_204856_485

I created a phone cosy with the kit I got for my birthday, which also got me a commission from my cousin to make her a kindle cosy…

IMG_20170501_100458_385
Which I have almost finished

This isn’t technically a made thing, but I’m including it because it took me nearly 10 days: turning a lovely skein into a massive bundle of knots and untangling it into a not-very-ball-shaped ball.

Screenshot_2017-05-03-09-51-37-1
I discovered that my muscle memory is pretty darn good and I can still remember how to knit, about 20 years after my Nan taught me

Screenshot_2017-05-03-09-52-05-1
I learned the beautiful Love Knot stitch and made most of a lacy scarf using it

20170423_102053-1

I made my first C2C piece; this loooovely scarf

wp-image-285039106jpg.jpg

I finished my first ever star blanket with my first ever Caron Cake

Screenshot_2017-05-03-09-52-19-1
I made this blue flower when I should have been unpacking. Procrastination for the win!

Screenshot_2017-05-03-09-52-24-1
I made up the pic-not stitch on my second ever star blanket.

wp-image-1883686381jpg.jpg

I started Mr Fox; another kit I got for my birthday

Crochet fox kit

I made a few Sand Swirl cards

I also made a birthday card for my cousin, but didn’t get a photo of it. I was really quite proud of it as well. Sigh.

So that was my April!

I’ve decided to set some goals for May, instead of just meandering from one half-finished project to the next as the fancy takes me:

  1. Finish pic-notting the baby blanket and get it sent to my sister
  2. Finish the kindle cosy and get it sent to my cousin
  3. Finish the lacy scarf and list it in the shop
  4. Finish the chevron blanket and gift it to my friend
  5. Get all my zentangle cards listed in the shop
  6. Make at least one knitted item
  7. Have at least 10 items listed in the shop

I’m determined that this will be the month of finishing things instead of getting distracted by the latest shiny new project. Wish me luck!

Hannah

xXx